Making Used Kitchen Cabinets Fit in Your Space

Making Used Kitchen Cabinets Fit in Your Space

Hello and welcome, I’m excited you’ve chosen to start this journey with us! I just want to start off by assuring you that  working with used kitchen cabinets isn’t as difficult as it looks or as you may have been told by others. There are tons of options and simple solutions to help you achieve your desired look as well as overcome your problems, and in this guide my goal is to show you what some of those are.  I’m confident by the end of it you’ll feel excited and empowered to get this project started.

Definitive Guide to Used Kitchen Cabinets

This is the biggest piece of advice that we can give our customers, which will help eliminate a lot of future headaches and frustrations: the cabinets you’re shopping for don’t need to have the exact same measurements as your existing cabinets. The box structure of cabinets allow them to be moved around and organized into many different angles and layouts.

We understand the difficulty in doing this on your own, which is why we provide all the tools you’ll need, including design services! You choose the kitchen you want, and it’s up to us to make it fit! After you have your design, all you have to do is install the cabinets and fill the gaps and dead space that you don’t want. That can be as simple as installing a piece of filler or you can go the extra mile and give your new kitchen even more utility with the unused space!

Below we’ll go over some of these easy solutions to some of the most common problems our customer’s face, and hopefully give you an idea of what you can do with your kitchen. Let’s get started! 

Missing Corners

When you’re trying to fit used kitchen cabinets into your space, the best place to start is at the corner. It’s the heart of the kitchen and everything else builds out from it. Sometimes you may find a kitchen on our website that you love, but unfortunately it doesn’t have the corner cabinet or just doesn’t have enough corner cabinets.  Don’t give up on that set though! All you need is some inspiration for what you can do if you don’t have the necessary corner cabinets. 

Use a 45-Degree Angle

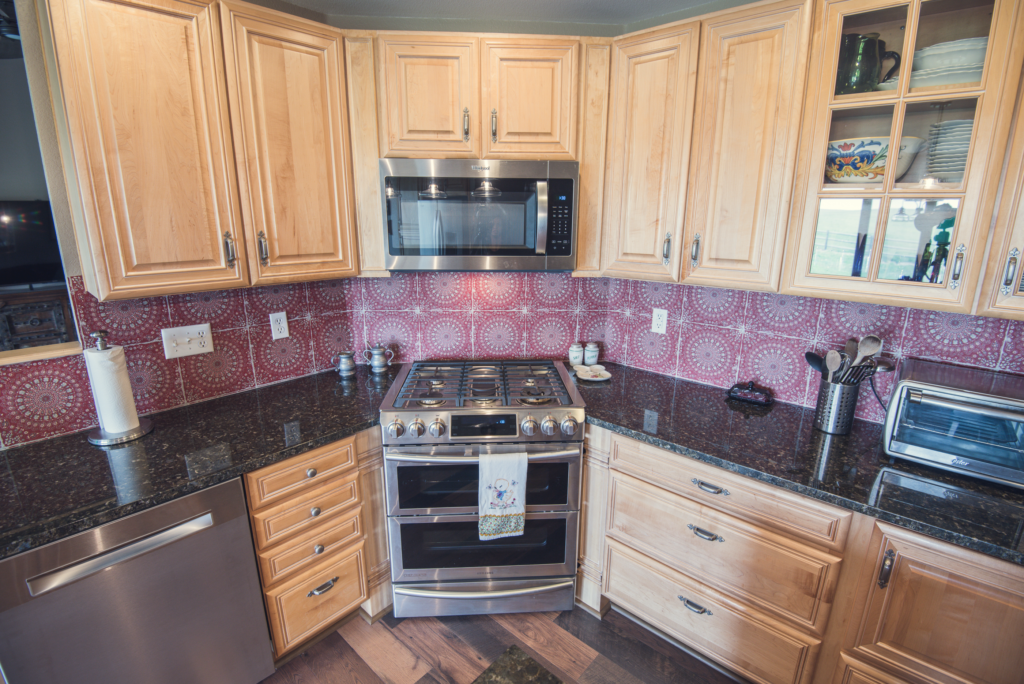
By going off a 45-­degree angle at the corner, you give yourself a lot of options. You could install just about any 18-­inch cabinet with a drawer base at this angle. Otherwise, you could put in a cabinet door with open space behind it. How you fill that space is up to you! If you want to go bigger, use the corner as your pantry. Either add a pantry cabinet or frame in a small room with a door for a walk-­in option. We’ve also seen customers use this part of the kitchen for a corner cooktop, range, or oven/microwave combo. 

Cheyenne 18 1
BRC SKU J21 07 scaled 1

Use a Blind Corner Cabinet

Using a blind corner cabinet is a great way to utilize that corner space without the need for another cabinet front. The term “blind” refers to the fact that one side of the cabinet is hidden from view, while it’s still able to be accessed from one of the cabinet fronts at the corner. All you need to achieve this is a cabinet base with two doors or two doors and two drawers. 

blind corner
blind corner left

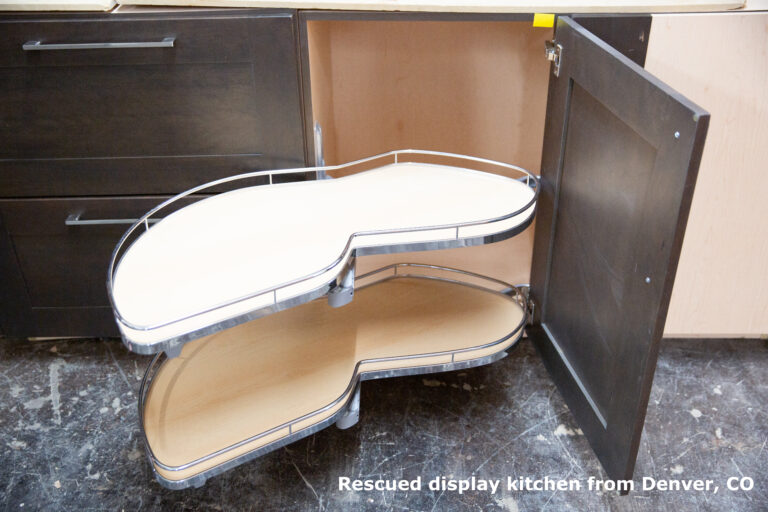
Blind corner organizers, such as the one in the photo below, are very popular and can be purchased online as well at your local big box stores. They come in various styles such as swing out, pullout, and even soft close sliding that attaches to the door!

3Y6A3091 1

Keep it as "Dead Space"

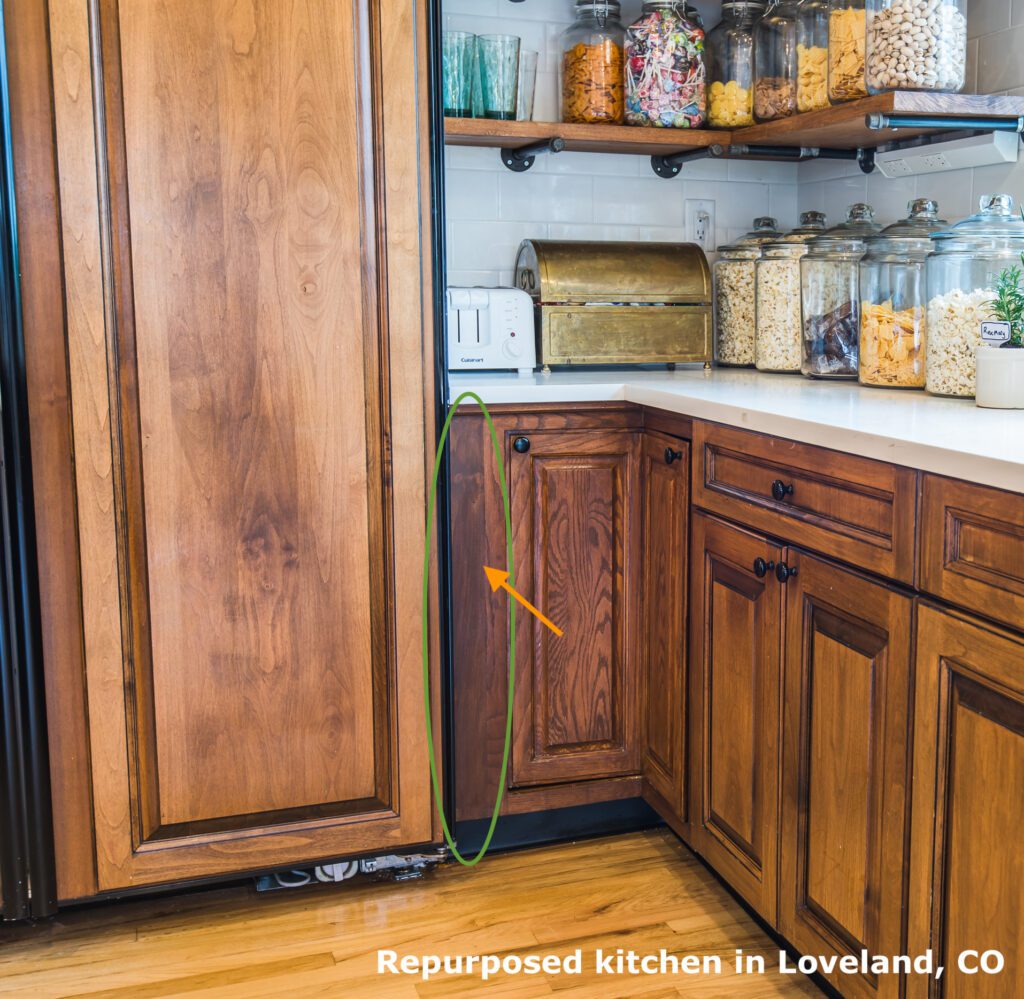
Another option, if you don’t have the means to make a blind cabinet or just don’t care too much about utilizing that corner space, is to just leave it as “dead space”. Look at the “dead space” in the photo below: it’s not even noticeable! Just use a piece of filler to give the cabinet at the corner some separation, and you’re good to go.

BRC SKU H27 07 3

Narrow Gaps (6" or less)

Now that you have some solutions for your corner space, you may be running into a few gaps between your cabinets. The good news is gaps are easy to fill and may even become a favorite part of your kitchen.

Use Filler w/ the Optional Spice Rack

Any of your small spaces can easily be filled by a piece of filler. All you need to do is go to your nearest Home Depot or local hardware store and find a section of wood and match it to your cabinets. You may have to bring in a piece so that an employee can match wood type and color. Then all that’s left is to install it.

6006Southridge 16
6006Southridge 5

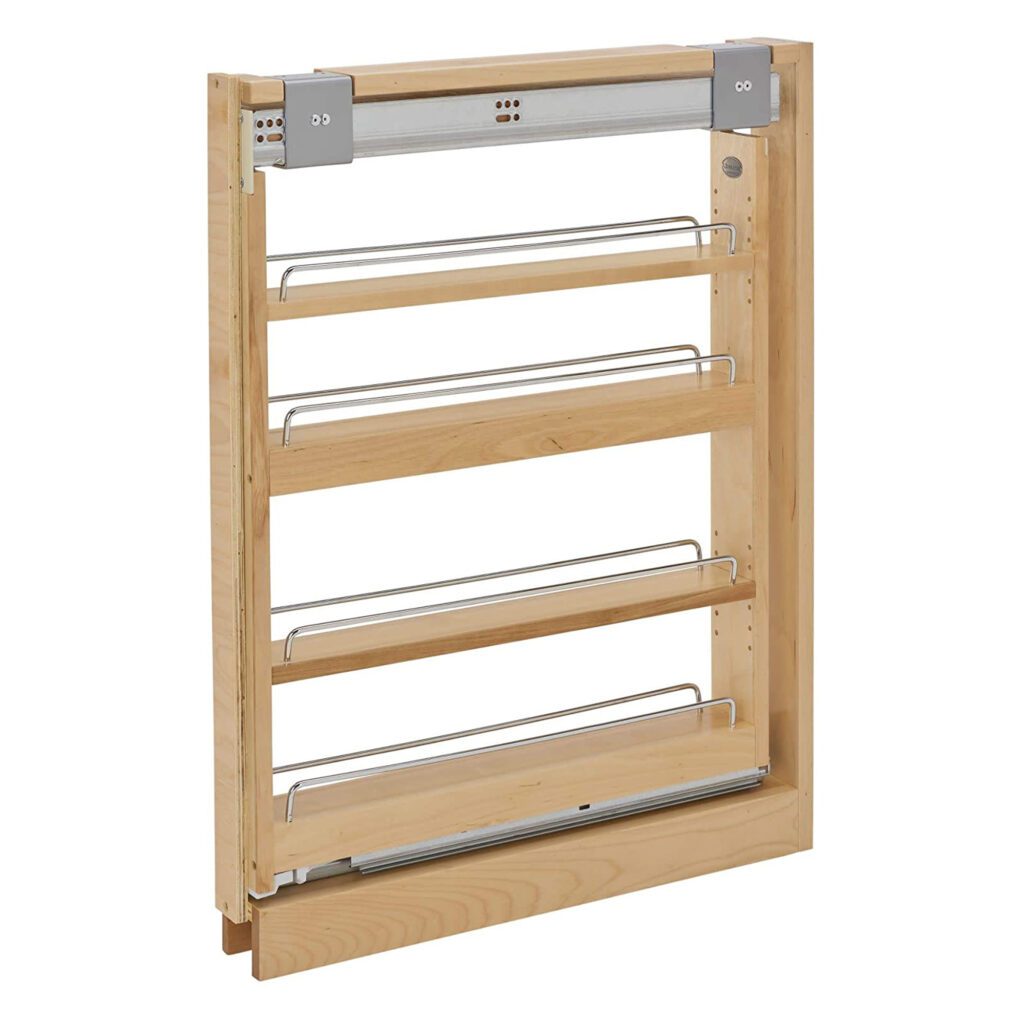
If you’d like to go a step further, a spice rack is a great addition and can be done very simply. To accomplish this you just need to find the spice rack you want. A quick Google or Amazon search will pull up all kinds of cool shelving options and built­in organizers for this space. (Try searching the brand Rev­-A­-Shelf!). After you’ve found the shelf or rack that you want, then you can just attach the filler piece (that you bought and finished in our last step) to the front.

5d9e105a 547b 4740 b5c2 d0a39b77a15c.0307dd8fb13abb61a28dc1c80575b9a5
BRC SKU J18 09 scaled 2

Add Some "Unique-to-You" Features

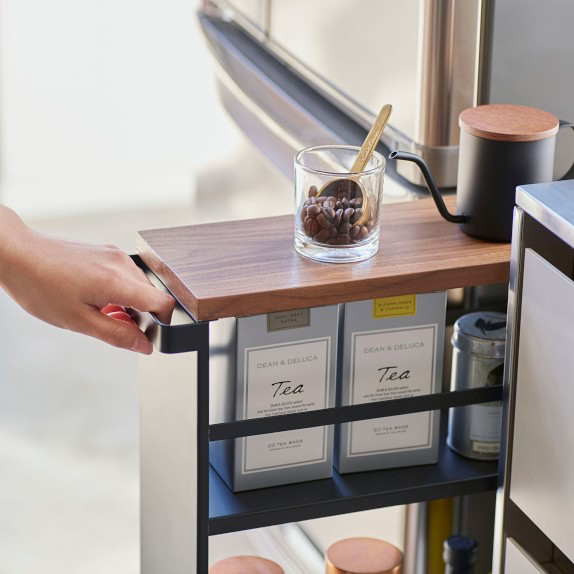
Some other options could be something like adding some shelves for wine bottle storage or even just filling the space with a rolling cart for storage or, as you can see in the photo below, a coffee and tea station. There really isn’t a limit (other than size) to what you can do with the space. That really is the beauty of remodeling a kitchen with used kitchen cabinets. It forces you to be creative, which means the end product may include some really cool features that you wouldn’t have even thought to include otherwise, and It’s these little details that result in a space that is uniquely you.

slim rolling storage cart with handle black 1 c Medium
BRC SKU H94 10 scaled 2

Missing Uppers

Up to this point, we’ve covered some easy DIY solutions for missing corner cabinets and narrow gap utilization. This next section will focus on the problem of your dream kitchen not having enough wall cabinets to fill your space. As always our solutions are easy for the typical buyer and they won’t only help solve your cabinet problem, but may in fact become a cool accent to your overall kitchen design.

Open Shelving Saves the Day

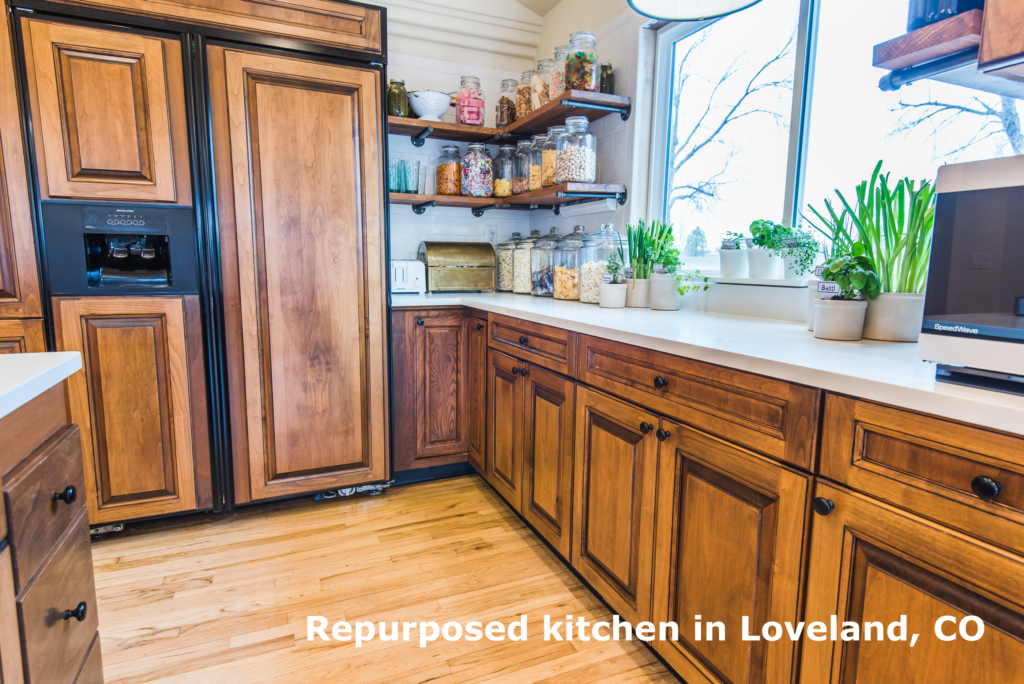
One of the easiest ways to fill in gaps caused by missing upper cabinets is to use open shelving. This solution is both practical and very trendy right now. Although you could paint or stain to match, open shelving also looks very good when it works as an accent. Consider using wood with a live edge, metal, or even glass (which creates this really cool floating dish effect) to bring some contrast to your kitchen. There are also different creative ways to mount open shelving, such as floating shelving (below) or suspended shelving (right).

6006Southridge 15 1
open shelving suspended
C Open Shelving Upper 1 1
untitled 2 1

Get Creative with Door Styles

If you want to avoid building cabinets that exactly match the rest of your kitchen, a gorgeous option is to use glass or lattice­-style doors. It’s not hard to get an upper box that serves it’s purpose and matches the rest of the cabinet boxes, and by using a glass insert cabinet door, you can bypass the need to match cabinet doors, which can be very difficult!

BRC SKU H70 10 1
BRC SKU H70 01

Use this kitchen as an example. You can see how the glass inserts can really go well with the overall design of the kitchen, and in this case I’d say they even compliment the rest of the kitchen.

Add Another Rack

You can never go wrong with a well placed wine rack (easily made with some wood planks) but you could also add plate racks. These could be made to match or presented as an accent to the rest of your kitchen design.

BRC SKU G43 07 1
BRC SKU G43 19 2

Add Some Beadboard

Adding some beadboard, which can be bought at most home improvement stores, is a simple and affordable way to spruce up some of that open space. You can see how this homeowner used it in the photo below, and they even added a plate organizer to really bring that space together!

SilverLeaf 4

Missing Bases

What if instead of missing uppers, your cabinet set is missing bases? This may seem daunting at first, but the following examples will show that you may not have needed those bases in the first place!

Use Upside-Down Uppers

We think it’s pretty neat how this kitchen island base incorporates upper cabinets that have been flipped upside down! 30 ­inch tall uppers create a regular height island. Taller uppers could be used for a raised bar seating portion. The only caveat with this, as you may have noticed, is that upper cabinets are usually 12″ deep and base cabinets are 24″ deep. The best place to use uppers in this way would be in a place like the back of an island, where it doesn’t matter if the cabinets are a little more shallow. 

BRC SKU H65 16

Add Your Appliance of Choice

Instead of adding more cabinets, how about a beverage fridge, an ice maker, a second dishwasher, or a wine fridge? These options can be fun and are generally more cost­ effective than purchasing a custom ­made cabinet. The appliances all come in a variety of widths, some even as narrow as 6″, which means you’re bound to find something that’ll fit the space your dealing with. 

Another Place for Open Shelving

Are you noticing a pattern here with open shelving? (See our “Above the Fridge” and “Missing Uppers” solutions.) You can install custom open shelving in place of missing cabinet bases, too.

BRC SKU H17 01 scaled 1
BRC SKU J21 11 2

If you’re wanting to differentiate some of the open shelving in your kitchen, add your own storage such as a wicker or wire basket! They can both be bought at any Walmart or Target, or you may even have a couple of your own that you can use!

Above the Fridge

A fridge is an essential part of any kitchen. But what do you do with the empty space above it? Here are a few ideas:

When in Doubt, Leave It Open:

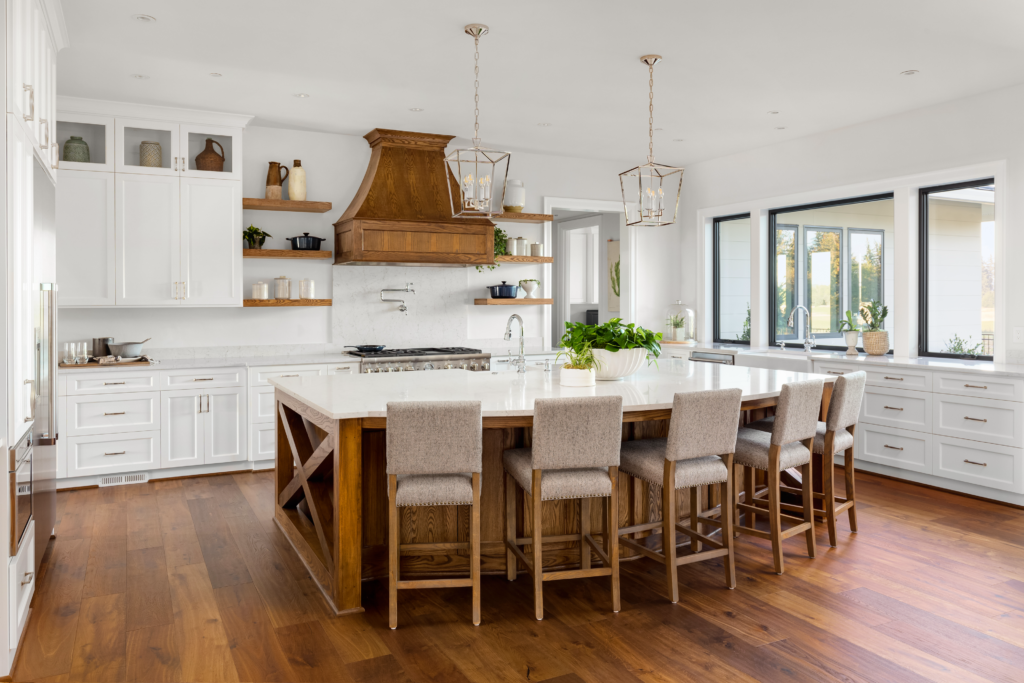
It’s important not to obsess over that rarely used space above the fridge. If you can’t find an easy way to use it, then just leave it open. The space sits up high enough that even where there is a cabinet above it, it doesn’t generally get used on a regular basis. Some kitchens don’t even integrate the refrigerator with the rest of the cabinetry.

4D33AF6C A253 4224 B468 5AF1CCD62747 e1678136752832
iStock 1215829069

That being said, there are plenty of cool ways to use the space if you so choose, and here are some of our favorites!

plymouth white kitchen emerald city llc imge291674f02e4039a 14 0908 1 ff3cb3d 1
1490199173297 e1678137103373
1b9ea78922b78fd98f482a9eb8773c38 1
Space Above the Refrigerator 3

Adding an Island

You can have an island even if one didn’t come with your recycled cabinet set! Here are some ways to include this feature.

Create a Contrast

Your cabinets do not have to be all the same color. In fact, two-­tone kitchens are stunning! We’ve even seen examples where the homeowner incorporated not only two, but three or four colors throughout their cabinets, shelves, and island. Contrast isn’t only limited to colors either. You could contrast styles such as modern and rustic, distressed and polished, or traditional and contemporary.
BRC SKU J14 02 2
1732905 4 1 1 1

You Don't Need Many Cabinets​

Islands don’t have to be overly complicated or consist of a large amount of cabinets. The most important part of the island is going to be the countertop, so really your goal is just supporting that piece of countertop. This can be done easily with as few as one or two cabinets. As you can see in the photos below there are a couple ways to do this. The island top could fit the cabinets exact, such as the photo on the right, or the top could extend out further and be supported by columns, like you see in the left photo.

BRC SKU G23 25 scaled 2
BRC SKU H17 01 scaled 1

Island Built of Beams

Islands with pillars and beams create an open and airy look for your kitchen. They also can provide a spacious seating area! As you can see from the photos below, there are a variety of ways to use beams or pillars to create an island. You can make use of reclaimed wood for a rustic look, like the photo to the right, or maybe you prefer a more “polished” look such as the photo below. You can also integrate a cabinet, or two, with the beams, such as in the photo in the bottom right.

il 1588xN.3640312265 nz2i
3c4146659ff65c96989baecafd39ab47
vermont country escape gilberte interiors inc imgd47163d107a35b47 7355 1 f08fedd w660 h439 b0 p0

Finishing Touches

What To Do About Crown Molding?​

The thing to remember here is that crown molding is completely optional. Many kitchen designs don’t even utilize crown molding.

BRC SKU J30 01 scaled 1

If you do want to install crown molding though, it’s as easy as going to your nearest hardware store or lumber yard and getting the necessary crown molding, boards, or trim pieces, painting or staining them, and installing them.

Classic paint main smaller Small 1
Kitchen Crown John Nailing Crown

Toekicks

Let me pose a couple questions for you. How important is the toekick in the grand scheme of things? Looking back, can you actually remember any of the toekicks in the kitchens we’ve looked at? The reason I ask this is because people tend to fret over this rarely noticed area of the kitchen. Toekick boards can be bought at any big box store. All you have to do is get the boards and paint or stain them to match. Nobody will ever notice if it’s not a perfect match.

BUILDING OUT THE TOE KICKS ON KITCHEN CABINETS 5

Rather than finishing their toe kick boards, some of our customers choose to overlay it with a rubber cove base, such as you see below. These come in different colors and provide homeowners with an option that resists a lot of damage.

If you’re feeling really creative, you could even turn your toe kicks into more storage space, like you see in the photo to the right.

UGSGF
omega cabinetry toekick drawer masterbrand cabinets inc img155137070ae74147 4 5961 1 0ca6c3b

Real Scenarios

To start opening your mind to the possibilities here, I’d like to walk you through a couple of scenarios.

Scenario #1

For the purposes of this demo, I’m going to use the Marilyn Montana kitchen pictured below. This gorgeous knotty alder soft­-close kitchen comes with a whopping 40 cabinets and 3 appliances, so that gives us lots of flexibility.
We have two customers, John and Jane, who are interested in this kitchen and want to see if it will work in their space. Their kitchen layouts are quite different from the original, but let’s see how this works out. Remember, cabinets are all different sizes, so you can put them together in almost countless different configurations.
BRC SKU F64 01 1 1
BRC SKU F64 08 1 1

Here’s the footprint of the original kitchen.

(Red lines show the walls, while black lines show where cabinets are placed)
Original Layout Footprint 1
John Layout Footprint 1

Here’s the footprint for John’s kitchen, including where he wants cabinets placed.

After a bit of finagling, here’s the layout we’ve been able to put together for John’s space. I think it fits nicely!
Marilyn Montana Option 1 Birds Eye View 1
In order to get to this point, we did have to do a bit of retrofitting.
Here are two photos that show what the kitchen looked like before we put on those finishing touches.
Marilyn Montana 1 Scene1 1
Marilyn Montana Option 1 Scene2 1
 A few issues become apparent from looking at these photos. First, the island has some exposed backs of cabinets showing, which is undesirable. This can be quickly resolved, however, as we just had to create a matching pillar and get some paneling for the back. There’s a decent chance the paneling could be obtained from the existing trim pieces, but if not we just need to take a piece of the cabinetry into our local paint store and have them match the stain for us, so that we can apply that stain to whatever paneling pieces we purchase. We would also use that stain on the unfinished pillar we found. 
The next issue that needs to be addressed is the gap in the right corner. John’s kitchen is U-­shaped, as many of our customers’ are, but not many of our million-dollar home kitchens have multiple corners, so that often requires us to be a bit creative. In this case, we just added some trim pieces (either from extra pieces in the set or by purchasing and staining pieces, as mentioned above), leaving some dead space in the corners that isn’t visible from the outside.
If you really don’t want any corner dead space, there are other things that can be done, such as making a blind corner cabinet from a two ­door upper.
From the pictures above, you can also see that we created an open shelving cabinet to fill in the space to the left of the fridge.
Again, we can easily get matching stain (or paint if applicable) from our local paint store, so creating something like this isn’t too difficult. I would strongly recommend doing something like this instead of going to the trouble of trying to order an additional cabinet from the manufacturer.
Now here are updated photos showing how we were able to fill those gaps and complete the design.
Marilyn Montana Option 1 Scene1 Modified 1
Marilyn Montana Option 1 Scene2 Modified 1

Scenario #2

Now let’s look at Jane’s kitchen. Here’s the footprint for the layout she wants.
Jane Layout Footprint 1
And the finished design that we’ve created for her.
Marilyn Montana Option 2 A 1
We just need some paneling and filler pieces to complete the island, sink base rounding the corner, and the dishwasher being at the end of the peninsula. Pretty simple!
Marilyn Montana Option 2 View 4 A 1
Notice how we were able to turn the wine rack and add a glass rack underneath to make it work for this space.
Marilyn Montana Option 2 View 3 A 1
Plus, we also took some extra cabinets and created a sideboard buffet piece to go in the living area.
Marilyn Montana Option 2 View 2 A 1
Marilyn Montana Option 2 View 2 Modified 1 1

Bonus Scenario!

Speaking of using extra cabinets, since our kitchens typically come from large homes, they can be enormous packages, especially when the supplier is removing cabinets from all throughout the home. That is the case with the Oslo Octavia pictured here, which creates almost limitless options for anyone doing a complete home renovation or a new build.
BRC SKU F24 01 1 scaled 1
Just as an example, see how we were able to use these cabinets in a completely different kitchen layout, while still having plenty left over to finish out a nice laundry room and master bath. 
Oslo Octavia Texture 1 1
Oslo Octavia Texture 2 1
Oslo Octavia Bath Texture 1
Oslo Octavia Laundry Rm. Texture 1

Well, we’ve reached the end of the advice I can give you through a webpage, but I’m sure your used kitchen journey is far from over. Each kitchen is different and each buyer has a different look they want to achieve. My goal here is to change the way you look at a used cabinet set. When you find a kitchen you love, don’t see issues that come up as a reason to skip out on this opportunity; see them as a challenge to overcome and a chance to make this kitchen into your kitchen. Thank you for joining me, and good luck on your kitchen-buying journey!

Feeling inspired after reading this? Click the button below to see what we have in stock!