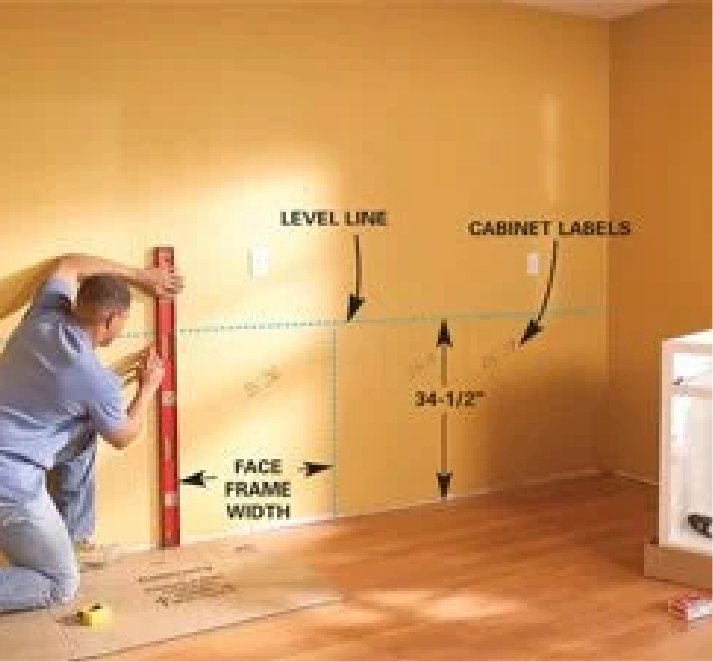
Using a pencil, draw your base cabinet, horizontal level line, 341⁄2“ (standard base cabinet height) up from the highest point along your kitchen walls. Note: Homes built within the past 40 years generally have a flat floor.
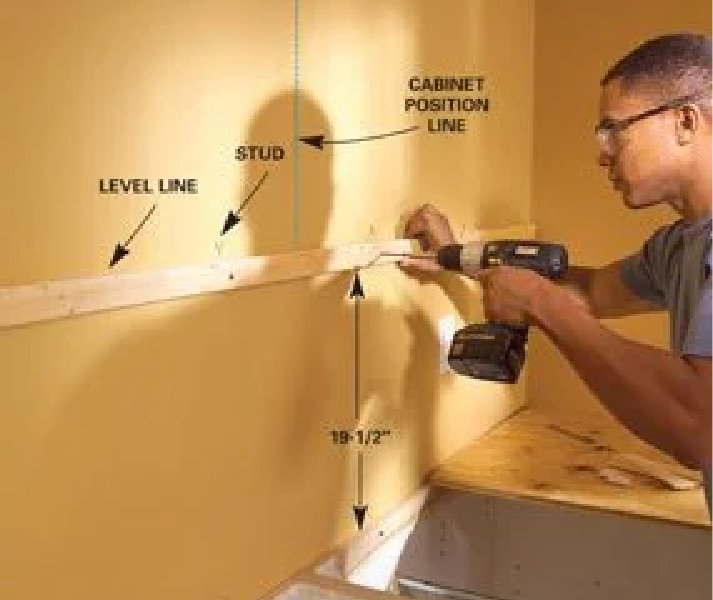
Then draw your wall cabinet, horizontal level line where the bottom of your wall cabinets will be, 191⁄2” up front the horizontal cabinet line. (It’ll be 18 inches after the countertop is installed.)
Test fit your cabinet configuration to ensure your configuration will work. Tip: It helps to also have all the doors and drawers removed.
Starting with the corner cabinets, carefully measure, draw and label each base cabinet and appliance location on the wall. Do the same for the wall cabinets. Use a 4-ft. level and a pencil. Note: The marks should reflect the width of the face frame, not the cabinet back, and don’t forget to leave room for FILLER.
Trace any islands and peninsulas on the floor for later. We recommend tracing the outside of the toe kicks, not the outside of the main box.
Use the masking tape to make labels of the cabinets and their corresponding spot in the layout.
Find and mark the stud locations just above the horizontal level line.
INTALL
BASE
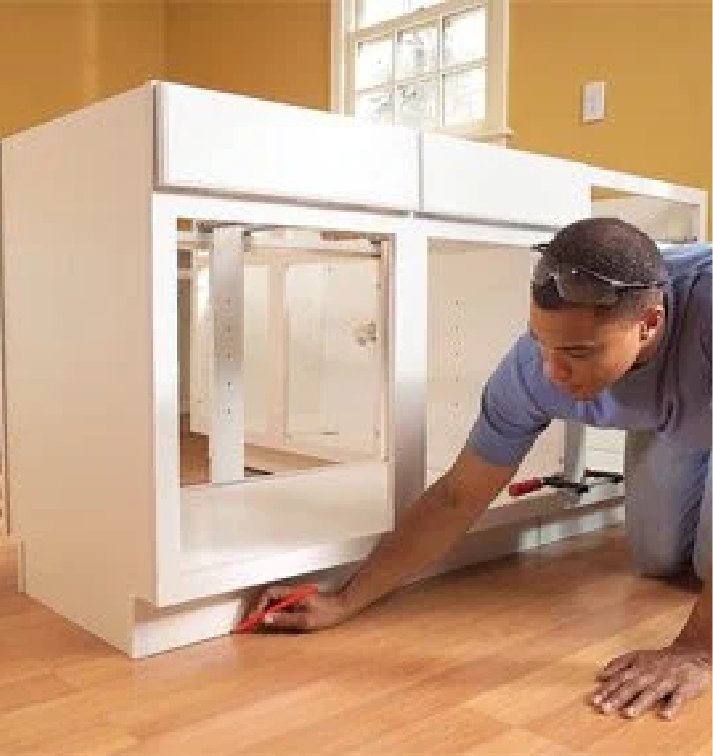
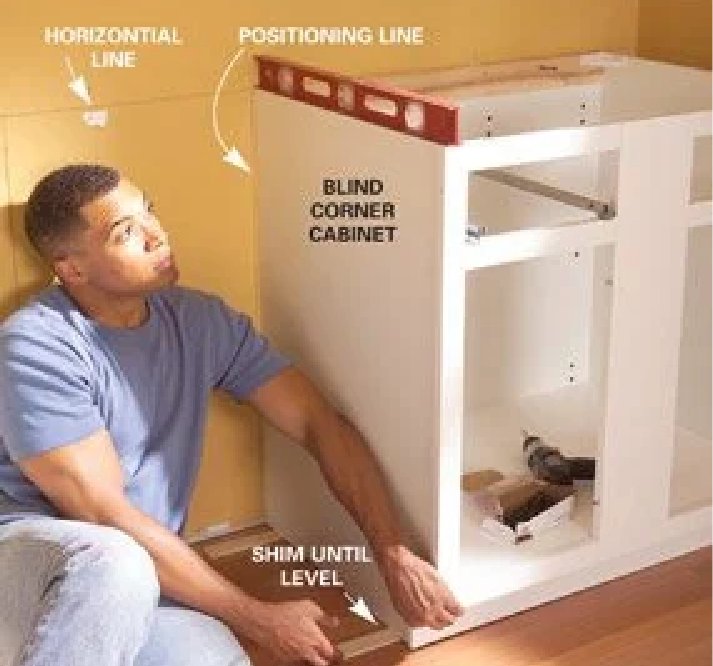
Starting from the corner again, set your first cabinet. Use shims to reach the height of the level line and level front to back.
Drive the 21⁄2” screws through the back of the cabinet into the wall studs. Note: If the previous holes are still in good shape go ahead and use those, but if not don’t be afraid to drill new holes with the countersink drill bit.
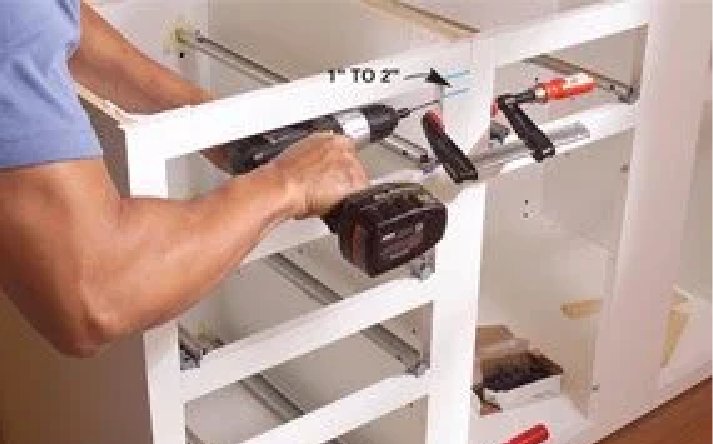
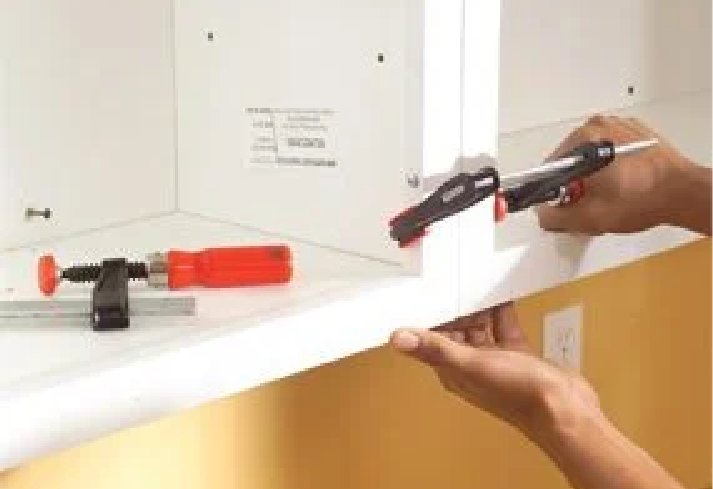
Set the next cabinet. Once it’s been anchored into the wall. Clamp the 2 cabinets together. Use the 2 1⁄2” screws and fasten the two cabinet’s face frames together. Note: These screws may be visible, so we recommend using the previous holes if possible. So as to not leave any holes visible.
Continue this process until all the perimeter base cabinets have been set.
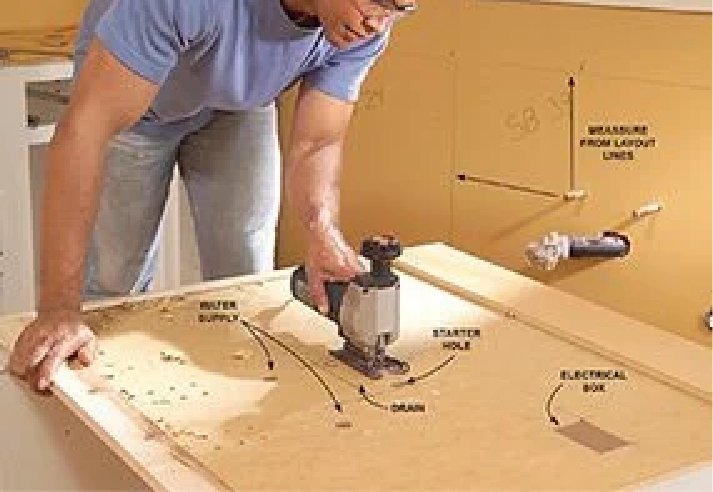
Use a plunge saw or jigsaw to cut out any plumbing or electrical fittings.
WALL
(BE SURE TO USE A HELPER!)
We recommend installing a 1×2 ledger board for the cabinets to sit on while you position them. This will result in a safer, more accurate installation. But you can still just use the drawn line as a guide if you’d like.
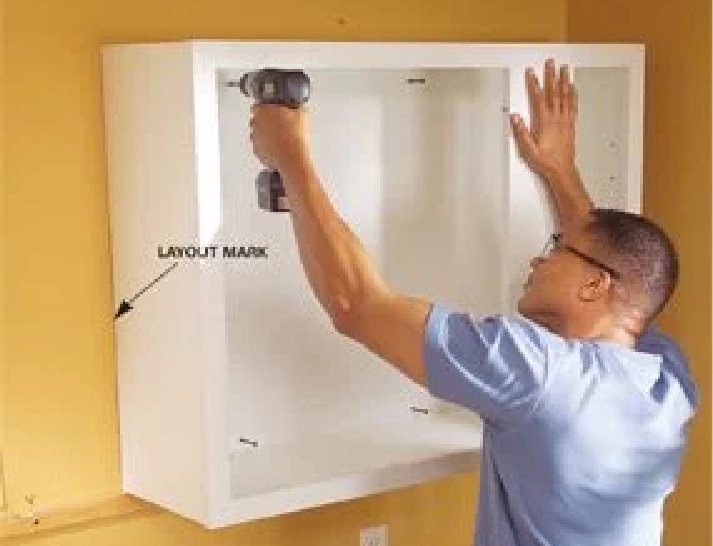
Starting at the corner and set your first cabinet. Use your screws to fasten the cabinet to the wall. Don’t forget to use your stud reference marks from earlier.
Set your next cabinets and repeat the process to fasten the face frames together until all your wall cabinets have been installed.
ISLAND/PENINSULA
(TIP: SAVE THIS FOR LAST TO GIVE YOURSELF PLENTY OF OPEN SPACES TO WORK)
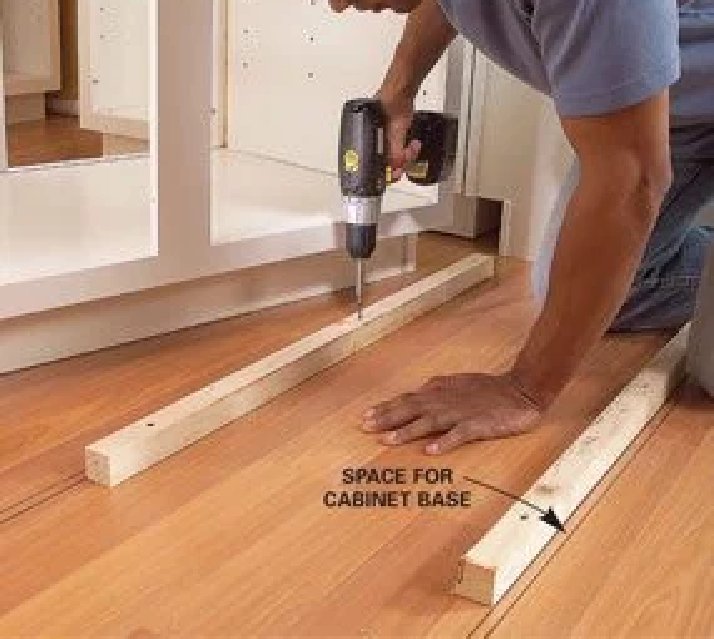
Using the traced island/peninsula toe kick lines from earlier, draw another line offset the thickness of the cabinet box. We will fasten support blocks to this line.
Measure and cut the 2×2 support blocks. They need to be roughly the length of the inside of the cabinet box, but not exact. Otherwise it can make it difficult to fit the cabinet box over the support blocks.
Fasten your cut blocks to the subfloor using the 2nd line as a guide.
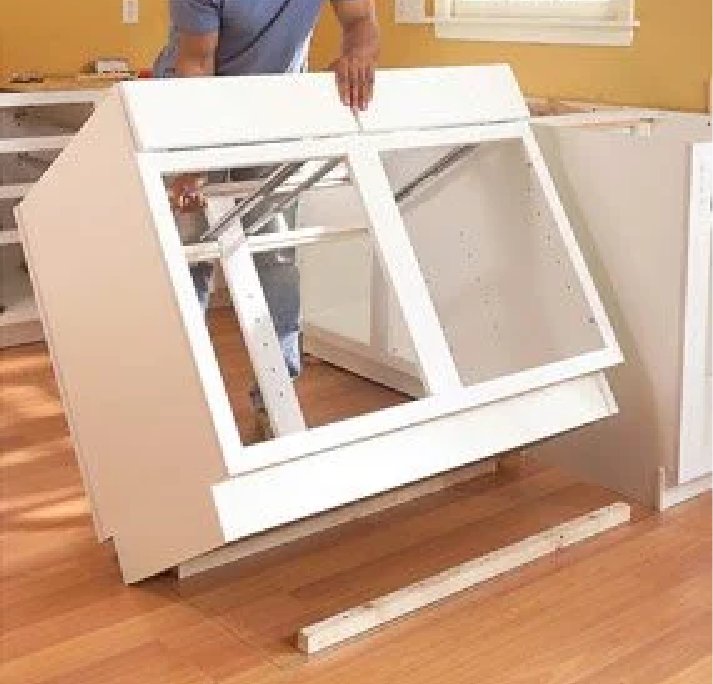
Set the cabinet over the blocking into your desired place. Use your screws to fasten the bottom of the cabinet to the blocking, using shims as necessary.
Repeat for the rest of the island/peninsula cabinets until finished.
You're All Set!
Time to break out the champagne and celebrate your beautify, new, and affordable kitchen. Not only have you saved money, but you saved another beautiful cabinet set from ending up in the landfill
want to remember this DIY Installation Guide? Download it here. Completely free