All About Drawers

BRC icon

ALL ABOUT DRAWERS

Installation Guide

CABINET DRAWERS

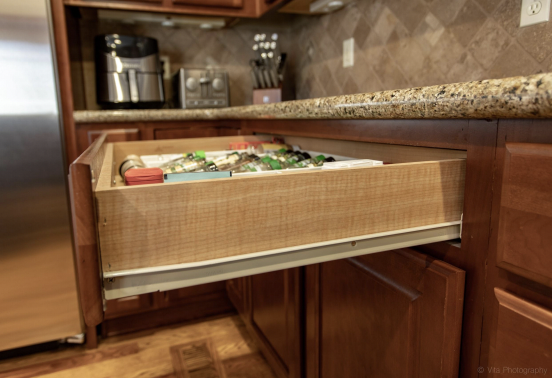
Kitchen cabinet drawers are one of the most, if not the most, used components of any kitchen. Stop!…Think back to how often you open and shut a drawer while you’re getting dinner ready or you’re searching for that specific item in the “junk drawer”or whatever the case may be. It’s a lot more than you thought, right? That’s why it’s important to under- stand all of the features and options there are when it comes to the construction of the cabinet drawers. Below we’ll outline everything you need to know about drawers, from the basic terms and construction of them to the repairing of existing drawers to fully replacing the drawer itself. By the end of this you’ll feel confident in deciding what types of drawers you want when choosing your new set of used kitchen cabinets.

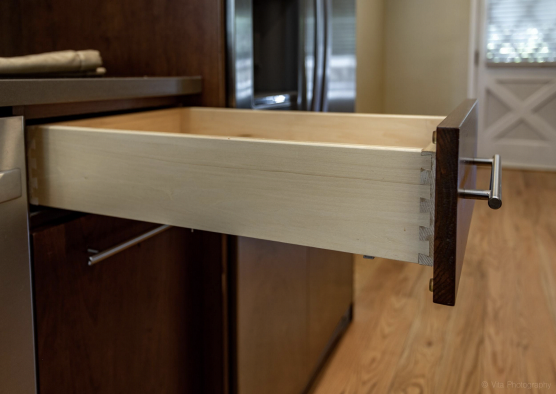
ANATOMY OF A CABINET DRAWER

DRAWER BOX

The drawer box is the main component of the whole drawer. It provides storage and is composed of two sides, a front, a back, and a bottom.

DRAWER FRONT

The drawer box is the main component of the whole drawer. It provides storage and is composed of two sides, a front, a back, and a bottom.

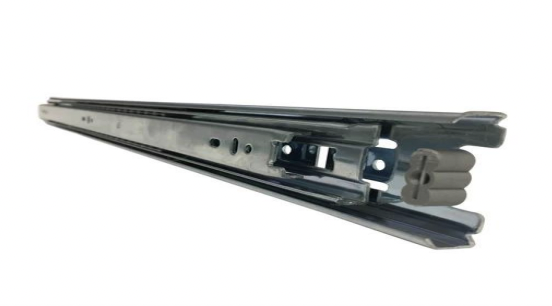
DRAWER GLIDES OR SLIDES

The drawer glides, also known as slides, are the piece of hardware that attaches to the drawer box that give it the telescoping motion. There are a variety of different types of glides. We’ll go over the main one’s we see on our used kitchen cabinet sets: Side Mounted Ball Bearing Glides, Undermount Glides, and Roller Glides. Glides can either be Standard 3⁄4 Extension, meaning that the drawer only pulls out 75% of the way or they can be Full Extension, meaning that the drawer fully extends which allows full access to the whole drawer.

  • Slide Mounted
    Ball Bearing Glides

are made with steel ball bearings that roll in a thin track. This allows the drawer to move in and out smoothly with less friction. These slides can hold a fair amount of weight, are inexpensive, and are easy to install. On the downside the ball bearing can get gummed up by dirt and dust fairly easily. Some people also don’t like the glide being visible.

Screen Shot 2022 10 25 at 12.35.39 PM

  • UNDERMOUNT GLIDES

have become the norm for high end cabinetry. They pair well with dovetailed cabinets because the glides are hidden. The only hardware attached to the box itself is a clip which locks it onto the track. The glide itself is mounted to the bottom or the sides of the cabinet box with the slide track. These can also hold a lot of weight. They are more expensive than your other options.
Screen Shot 2022 10 25 at 12.35.34 PM
Screen Shot 2022 10 25 at 12.35.27 PM

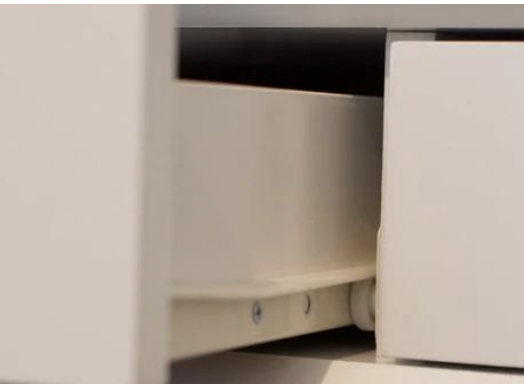
  • ROLLER GLIDES OR EURO SLIDES

are attached on the side, along the corners of the drawer box, with a rolling wheel to allow it to move back and forth along the track. This is going to be your least expensive option. They don’t hold a lot of weight but will work for most things in your kitchen. It’s not possible to add other features like soft close to roller glides.

DRAWER PULL

The handle, or knob, that’s used to open the drawer. This is purely an aesthetic choice. Swapping out your pulls is an easy and great way to modernize your set of used kitchen cabinets!

JOINTS

At Ben’s Repurposed Cabinetry the cabinets we recycle generally have either drawers with Stapled Joints or Dovetailed Joints. Some older styles of drawer construction have metal drawer boxes or other outdated methods of joinery. Those tend to be less durable methods of joining, so we will stick to the two main ones.

  • STAPLED JOINTS

are exactly what you’d think they’d be. The sides of the drawer box meet with the drawer box front and back at a 90 degree angle, and then it’s stapled to secure it together. This provides a drawer box that serves its purpose, but is not quite as dura- ble as a dovetailed joint. Stapled joints are commonly paired with Side Mount Glides.
Screen Shot 2022 10 25 at 12.35.10 PM
Screen Shot 2022 10 25 at 12.35.04 PM

  • DOVETAILED JOINTS

are the more preferred and more popular option when it comes to cabinet drawers. This type of joint is made up of interlocking wedges called pins and tails, that are used on the front and back corners of the drawer box for optimal strength. When it’s done well it doesn’t require any fasteners, although adhesive is often used. Dovetailed joints must be used in conjunction with undermount glides.

DRAWER MOTIONS

  • STAPLED JOINTS
drawer slides prevent the door from slamming closed. They have a mechanism that catches the glides and eases it closed. Many of our sets at Ben’s come equipped with soft close.
  • STAPLED JOINTS
drawer slides help to keep your drawers shut. When the drawer slide reaches a certain point it automatically retracts keeping the drawer shut.
  • PUSH-TO-OPEN
can be found in some of the most luxurious kitchens, specifically flat front cabinets. This type of drawer is opened by pushing the front of the drawer, and pushing it in again to keep it closed. This eliminates the need for pulls.

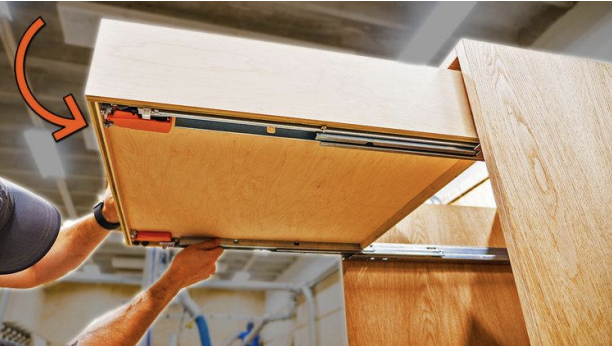
CABINET DRAWER REPAIRS

There are 3 common ways that drawers tend to break down: 1) the bottom panel of the drawer bulges out, 2) the front panel of the drawer becomes loose, damaged, or falls off, or 3) the drawer glides become worn out. Below we’ll go over how to fix those types of defects yourself. If the drawer is damaged more than that it may make more sense to just order a new box or drawer front or both. We’ll show that below as well. Before starting any repairs always double check that it’s not something as simple as tightening some screws on the glides.

FIXING A BROKEN DRAWER FRONT

1

Start by removing the screws that attached the drawer front to the drawer box. These will be located inside the drawer box.

2

Access the damage. If the damage is substantial you may want to try to order a new one from the cabinet manufacturer if you know who that is, otherwise a website like Cabinet Door Store | Drawer Front may have your particular drawer front style. From there it is as simple as giving them the dimensions and ordering it.

3

If the damage was just a matter of it coming off the drawer box, then the drawer front will need new pilot holes and fasteners to re-secure it properly.

4

Start by using a 3/16th drill bit to drill new pilot holes next to the original holes of just the drawer box. NOT THE DRAWER FRONT

5

If the original screws are still usable then go ahead use them to reattach the drawer front to the drawer box using the new pilot holes.

**  If you need new screws then order them here Wood Screws | The Home Depot or you can take your original screws into any hardware store and they’ll help you match your particular screw.

REPLACING BALL BEARING GLIDES (SLIDES)

1

Inspect all screws. Slides can begin to wobble and not function properly if the screws are loose.

2

Sometimes a new screw is needed in a new hole. Most glides have multiple holes to use

3

If the glides are completely worn out then just replace them.

4

Use a screwdriver and the screws provided with the new glides to attach it to the drawer box. Try to avoid using previous holes in the box.

5

Also take this time to consider getting undermount glides, if you’re able.

INSTALLING UNDERMOUNT GLIDES

There are 3 common ways that drawers tend to break down: 1) the bottom panel of the drawer bulges out, 2) the front panel of the drawer becomes loose, damaged, or falls off, or 3) the drawer glides become worn out. Below we’ll go over how to fix those types of defects yourself. If the drawer is damaged more than that it may make more sense to just order a new box or drawer front or both. We’ll show that below as well. Before starting any repairs always double check that it’s not something as simple as tightening some screws on the glides.

1

Buy your undermount drawer glides. At The Cabinet Door Store online you just need your drawer length to find the size you need. These Blum brand glides are very popular.

2

Use the provided screws to attach the locking mechanisms to the underside of the drawer box. These generally have an orange clip you can squeeze to pull the drawer out of the runner.

3

Use the screws provided to install the runners, as well as the rear brackets.

4

Place the drawer into the runners and close all the way. You should hear a clicking sound. That is the locking mechanism.

5

Ensure that you can smoothly pull the drawer in and out.

BUYING A DRAWER REPLACEMENT

Sometimes the best answer is to just save the headache and order a new drawer. You could order what you need from a cabinet manufacturer or maybe from a hardware store, but chances are it’s going to take a long time to complete and would end up being fairly costly. Luckily, there’s places online that specialize in drawers, doors, and hardware. They allow you to plug in your measurements and order directly. You can adjust the cost depending on the material and other options they give you.

You're All Set!

Not only have you saved money, but you saved another beautiful cabinet draw set from ending up in the landfill.

want to remember this DIY Installation Guide? Download it here. Completely free

eBook all about drawers